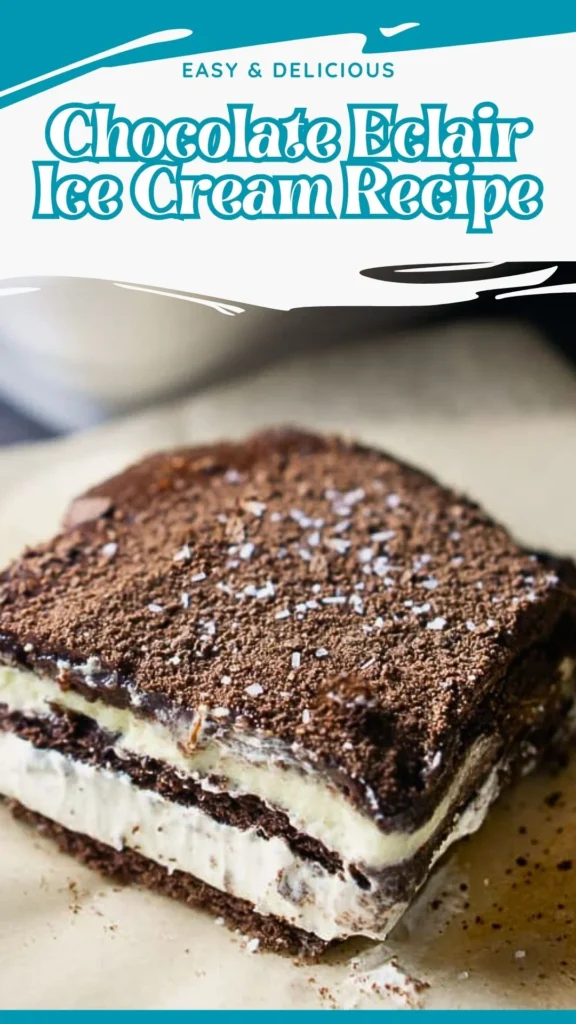
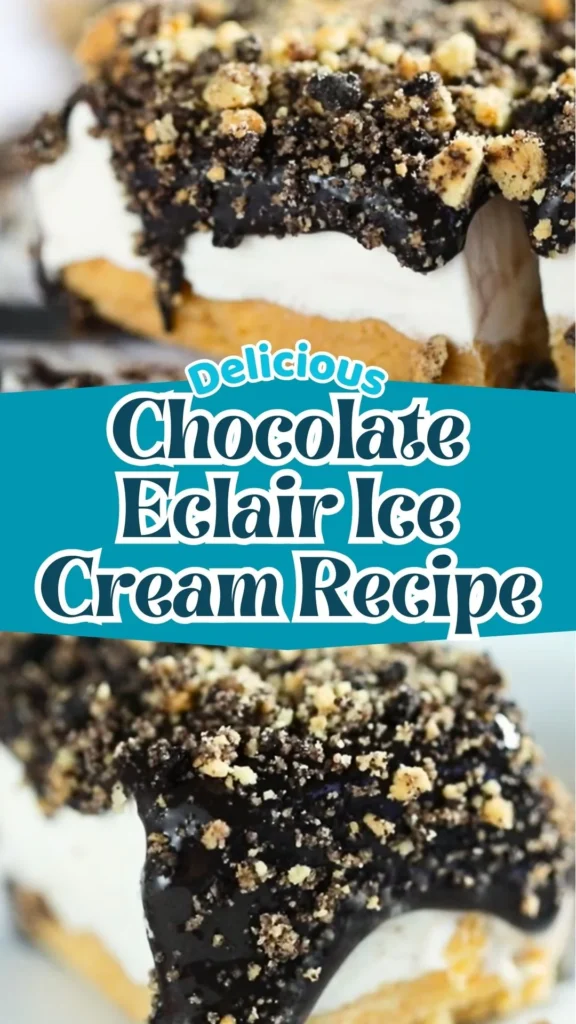
This copycat chocolate eclair ice cream recipe brings the beloved frozen dessert bar right to your kitchen. Whether you’re craving chocolate eclair ice cream cake for a crowd or individual eclair ice cream bars for grab-and-go treats.
This easy chocolate ice cream recipe delivers bakery-worthy results with simple pantry ingredients and straightforward techniques. This homemade ice cream recipe combines a buttery golden Oreo crust, silky vanilla ice cream, rich chocolate ice cream, and a crunchy cookie toppin all without an ice cream maker.
With layers of creamy vanilla, rich chocolate, and crunchy graham crackers, you’ll recreate that nostalgic treat without any special equipment.
What Does Chocolate Eclair Ice Cream Taste Like?
This ice cream eclair dessert captures the essence of classic French pastries in frozen form.
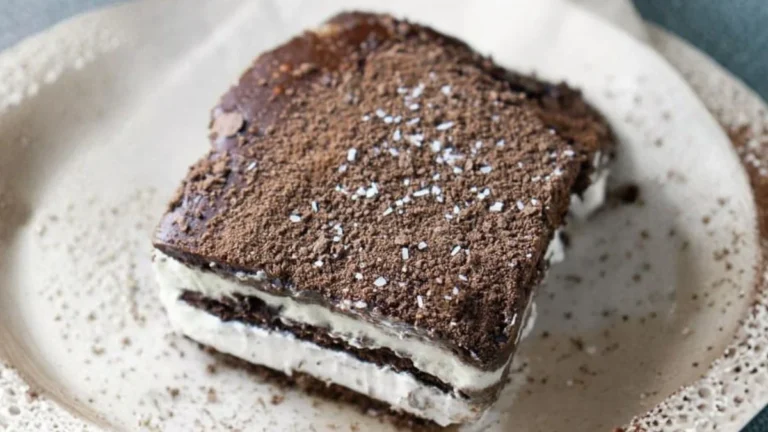
The chocolate eclairs ice cream layers offer a sophisticated balance: creamy vanilla bean custard flavor meets deep, fudgy chocolate reminiscent of brownie batter. The golden Oreo crust provides buttery sweetness and sandy texture, while the dual-cookie crumble topping adds delightful crunch.
Each bite delivers the signature contrast between smooth, cold creaminess and crispy cookie pieces exactly what makes traditional eclair ice cream bars so addictive, but with homemade freshness and customizable sweetness levels.
Ingredients and Kitchen Utensils
Chocolate Eclair Ice Cream Recipe Ingredients
Golden Oreo Crust:
- 24 golden Oreos (cookies and filling)
- 5 tablespoons butter, melted
Vanilla Ice Cream Layer:
- 14 ounces sweetened condensed milk
- 2 teaspoons vanilla extract
- 1 vanilla bean, scraped (seeds only)
- ¼ teaspoon sea salt
- 2 cups heavy cream, chilled
Chocolate Ice Cream Layer:
- 14 ounces sweetened condensed milk
- ¼ cup dark cocoa powder
- ½ cup fudge brownie mix
- 1 teaspoon vanilla extract
- ¼ teaspoon sea salt
- 2 cups heavy cream, chilled
Cookie Crumb Topping:
- 8 golden Oreos
- 8 chocolate creme Oreos
- 1½ tablespoons butter, melted
Kitchen Utensils
- 9×9-inch square cake pan
- Parchment paper
- Food processor
- 4 medium mixing bowls
- Hand mixer or stand mixer
- Whisk
- Rubber spatula
- Measuring cups and spoons
- Sharp knife for cutting bars
- Optional: popsicle sticks for individual servings
Preparation and Cooking Time
Prep Time: 30 minutes
Freezing Time: 8-10 hours (overnight recommended)
Total Time: 8 hours 30 minutes
Servings: 16 bars or 12-16 cake slices
Difficulty Level: Easy (no baking or ice cream maker required)
Chocolate Eclair Ice Cream Recipe Instructions
Step 1: Prepare the Pan and Crust
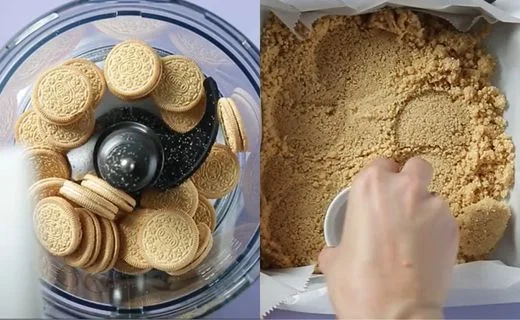
Line your 9×9-inch cake pan with parchment paper, allowing 2-3 inches of overhang on opposite sides this becomes your handle for easy removal later. Add 24 golden Oreos to your food processor and pulse 8-10 times until you achieve fine, even crumbs with no large chunks remaining.
Step 2: Create the Crust Base
Transfer the Oreo crumbs to a bowl and pour in 5 tablespoons melted butter. Stir thoroughly with a fork until every crumb is coated and the mixture looks like wet sand. Dump into your prepared pan and press firmly with the bottom of a measuring cup or your hands, creating an even, compact layer that reaches all corners. Freeze for 15 minutes while you prepare the vanilla layer.
Step 3: Make the Vanilla Ice Cream Base
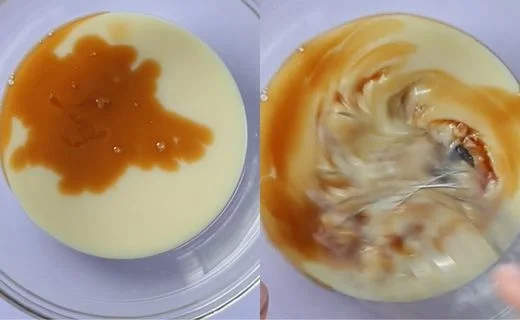
In a medium bowl, whisk together 14 ounces sweetened condensed milk, 2 teaspoons vanilla extract, the seeds from 1 vanilla bean (run your knife along the split pod and scrape), and ¼ teaspoon sea salt until completely smooth. Set aside.
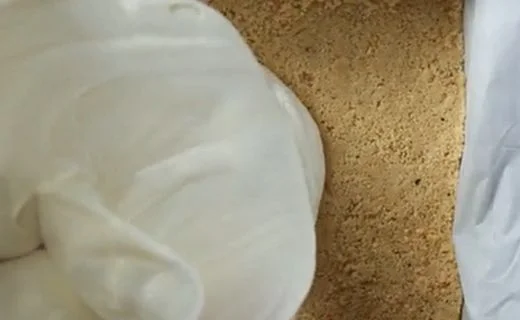
Step 4: Whip and Fold the Vanilla Layer
In a separate chilled bowl, whip 2 cups cold heavy cream with your hand mixer on medium-high speed for 3-4 minutes until stiff peaks form (the cream should hold its shape when you lift the beaters). Scoop about ½ cup whipped cream into the condensed milk mixture and fold gently to lighten it. Then pour this lightened mixture back into the bowl with remaining whipped cream and fold carefully with a rubber spatula using broad strokes until just combined don’t overmix or you’ll deflate the airiness.
Step 5: Layer and Freeze Vanilla
Pour the vanilla ice cream mixture over your chilled crust and spread evenly with an offset spatula or the back of a spoon. Return to the freezer for 2 hours until firm enough to support the chocolate layer without mixing.
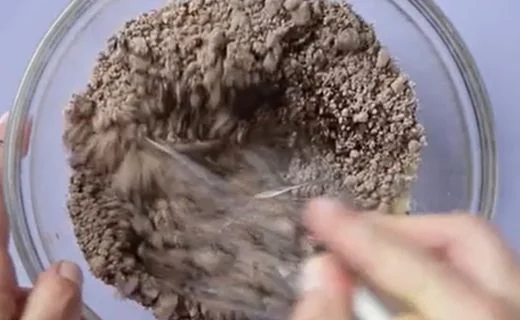
Step 6: Prepare the Chocolate Ice Cream Base
In a clean medium bowl, whisk together 14 ounces sweetened condensed milk, ¼ cup dark cocoa powder, ½ cup fudge brownie mix, 1 teaspoon vanilla extract, and ¼ teaspoon sea salt. Whisk vigorously for 1-2 minutes until the cocoa powder is fully dissolved and no lumps remain the mixture should be glossy and smooth.
Step 7: Whip and Fold the Chocolate Layer
Using a clean bowl, whip another 2 cups chilled heavy cream to stiff peaks (3-4 minutes). Fold about ½ cup whipped cream into the chocolate base to lighten, then fold the chocolate mixture back into the remaining whipped cream using the same gentle folding technique.
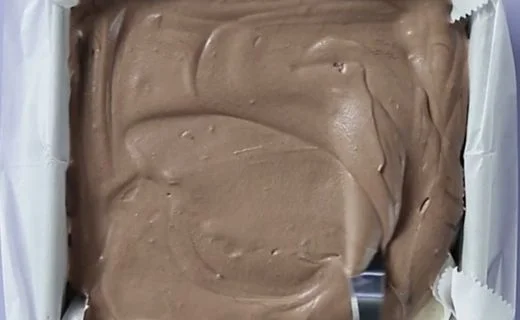
Step 8: Add Chocolate Layer
Carefully spread the chocolate ice cream mixture over the set vanilla layer, smoothing to the edges. Return to freezer for 30 minutes just enough to partially set the surface so the cookie crumbles won’t sink.
Step 9: Create Cookie Crumble Topping
Pulse 8 golden Oreos and 8 chocolate creme Oreos in your food processor until you have coarse crumbles (pulse 4-5 times you want texture, not powder). Mix with 1½ tablespoons melted butter until the crumbles are loosely coated but still crumbly.
Step 10: Top and Final Freeze
Sprinkle the cookie crumbles evenly over the semi-frozen chocolate layer, pressing very gently if needed. Cover the pan with plastic wrap or foil and freeze overnight, or at minimum 6-8 hours, until completely solid.

Step 11: Slice and Serve
When ready to serve, lift the frozen dessert from the pan using the parchment overhang. Place on a cutting board and let sit at room temperature for 3-5 minutes to make slicing easier. Use a sharp knife dipped in hot water (wipe between cuts) to slice into 16 bars or your desired portions. For authentic eclair ice cream bars, insert popsicle sticks into individual pieces before the final freeze or immediately after cutting.
Customization and Pairing Ideas for Serving
1. Coffee Shop Eclair Bars
Transform your chocolate eclair ice cream into a mocha masterpiece by adding 2 tablespoons instant espresso powder to the chocolate layer. The coffee amplifies the chocolate intensity while adding sophisticated bitterness. Serve alongside hot espresso for an affogato-style experience, or drizzle with salted caramel sauce for a trendy café-inspired presentation.
2. Cookies and Cream Overload
Double down on the Oreo theme by folding crushed Oreo pieces directly into both ice cream layers before freezing. Mix ½ cup crushed cookies into the vanilla layer and another ½ cup into the chocolate layer for extra texture. This variation appeals to cookies-and-cream fanatics and adds delightful crunch throughout, not just on top.
3. Fruit-Swirled Summer Version
Lighten this homemade ice cream recipe for warmer months by swirling raspberry or strawberry puree through the vanilla layer. After spreading the vanilla mixture, dollop 3-4 tablespoons of seedless jam or fresh fruit puree on top and swirl with a knife for marble patterns. The tartness cuts through the richness beautifully perfect for outdoor gatherings.
4. Elevated Dinner Finale
Transform your Mediterranean evening into a memorable culinary journey by pairing this French-inspired frozen dessert with savory lamb meatballs and tangy yogurt dill sauce. The creamy chocolate base perfectly contrasts garlic-herb flavors, creating an elegant course progression that delights guests.
5. Peanut Butter Chocolate Eclair
Create a Reese’s-inspired twist by replacing half the vanilla layer with peanut butter ice cream. Mix ½ cup creamy peanut butter into half your vanilla base before whipping. Layer vanilla, then peanut butter, then chocolate for three distinct flavors. Garnish with chopped peanut butter cups for the ultimate indulgence.
6. Bourbon Pecan Grown-Up Bars
Elevate this easy chocolate ice cream recipe for adult palates by adding 2 tablespoons bourbon to the chocolate layer and folding toasted chopped pecans into the vanilla layer. The whiskey enhances the chocolate’s complexity without tasting overtly boozy (alcohol prevents over-hardening too). Perfect for dinner parties and sophisticated celebrations.
7. Mini Eclair Bite-Sized Treats
Use a mini muffin tin instead of a square pan for portion-controlled ice cream eclair bites. Press crust into each cup, add a spoonful of vanilla, then chocolate, and top with crumbles. These adorable mini versions are perfect for kids’ parties, buffets, or when you want built-in portion control without slicing.
8. Light Mediterranean Conclusion
After enjoying crispy pita bread paired with smooth chickpea hummus, cleanse your palate with this rich custard-based ice cream featuring dark chocolate swirls. The transition from warm, savory appetizers to cold vanilla-infused sweetness provides textural contrast and satisfying flavor balance throughout your meal.
9. Hot Fudge Sundae Presentation
Serve your chocolate eclair ice cream cake restaurant-style by plating individual slices over warm hot fudge sauce. Add a dollop of whipped cream, a sprinkle of toasted nuts, and a fresh cherry on top. The temperature contrast between cold ice cream and hot fudge recreates that classic sundae experience while showcasing your homemade creation’s beautiful layers.
Essential Tips for Perfect Chocolate Eclair Ice Cream
1. Temperature Control is Critical
Keep your heavy cream refrigerated until the moment you need it ideally 40°F or below. For extra insurance, chill your mixing bowls and beaters in the freezer for 15 minutes beforehand. Cold equipment helps heavy cream whip faster and achieve better volume. If your kitchen is warm (above 75°F), work quickly and consider whipping cream in batches to maintain optimal temperature throughout the process.
2. Master the Folding Technique
The secret to maintaining that airy, scoopable texture in this best chocolate ice cream recipe lies in proper folding. Use a rubber spatula and cut down through the center of the mixture, sweep along the bottom, then up the side and over the top in a circular motion. Rotate the bowl a quarter turn and repeat until just combined. Stop while you still see a few streaks overmixing deflates the whipped cream and creates icy, dense results.
3. Don’t Skip the Partial Freeze
That 30-minute partial freeze before adding cookie crumbles prevents them from sinking into the chocolate layer and disappearing. The surface needs to be tacky but not liquid. Test by gently touching the center it should hold a fingerprint without being completely solid. This step ensures your topping stays visible and crunchy rather than becoming soggy and hidden.
4. Quality Cocoa Makes a Difference
Since this recipe relies on cocoa powder for chocolate flavor without melting chocolate, quality matters significantly. Dutch-process dark cocoa (like Hershey’s Special Dark) provides deeper, less acidic flavor than natural cocoa. For the ultimate chocolate eclairs ice cream experience, consider premium brands like Valrhona or Ghirardelli. Sift cocoa powder if it’s lumpy before whisking into condensed milk.
5. Real Vanilla Bean vs. Extract
While you can substitute the vanilla bean with an additional teaspoon of vanilla extract, those visible specks and intense flavor from fresh vanilla beans elevate this from good to extraordinary. One vanilla bean typically costs $3-6 but transforms the vanilla layer into something restaurant-worthy. Save the scraped pods in sugar to make vanilla sugar for other baking projects nothing goes to waste.
6. Perfect Slicing Technique
The difference between jagged, crumbly bars and clean, professional-looking slices comes down to knife technique. Run your large chef’s knife under very hot water for 30 seconds, wipe completely dry, then make one cut. Wipe the blade clean, reheat under hot water, dry, and repeat. This melts through the ice cream cleanly rather than dragging and compressing. For extra-clean edges, trim and discard (or snack on) the outer ¼ inch from all sides.
7. Customize Sweetness Levels
If you find traditional eclair ice cream bars too sweet, this homemade version offers flexibility. Reduce condensed milk to 12 ounces per layer for less sweetness, or add an extra ¼ teaspoon sea salt to each layer for sweet-salty balance. You can also swap regular Oreos for the golden ones in the crust for a less sweet, more chocolatey base. Taste your mixtures before freezing and adjust once frozen, you’re committed.
Storage and Reheating Guidance
Store your chocolate eclair ice cream cake tightly wrapped in plastic wrap or in an airtight container for up to 2 weeks in the freezer. Individual bars can be wrapped separately in parchment and stored in freezer bags for grab-and-go convenience. No reheating needed simply let sit at room temperature for 3-5 minutes before serving for easier slicing and optimal creamy texture.
Common Queries and FAQs
Find clear answers to the top questions about Chocolate Eclair Ice Cream Recipe.
Can I make this recipe without a food processor?
Absolutely! Place your Oreos in a large zip-top bag, seal out excess air, and crush with a rolling pin or the bottom of a heavy pot until you achieve fine, even crumbs. This method takes slightly longer but works perfectly for both the crust and topping. Just ensure you crush thoroughly large chunks won’t bind properly with butter or create that signature eclair texture.
Why use both cocoa powder and brownie mix in the chocolate layer?
The combination creates more complex chocolate flavor with added depth. Cocoa powder provides pure chocolate intensity, while brownie mix contributes subtle notes of vanilla, salt, and sometimes a hint of coffee that mimics the sophisticated taste of premium chocolate eclair ice cream bars. The brownie mix also adds slight thickness that helps the layer hold together. You can substitute with ½ cup additional cocoa powder plus 2 tablespoons sugar if needed.
Can I substitute the sweetened condensed milk?
Sweetened condensed milk is essential to this no-churn method it provides sweetness, creaminess, and prevents ice crystals from forming. You cannot use evaporated milk as a substitute. For a dairy-free version, try coconut condensed milk (Nature’s Charm brand works well), though the flavor will have coconut notes. There’s no effective low-sugar substitute that maintains the same texture, as the sugar content prevents icy crystallization.
How do I prevent ice crystals from forming?
Ice crystals form when ice cream freezes too slowly or contains too much water. Ensure your freezer is set to 0°F or below. Minimize the time ingredients spend at room temperature during preparation. The whipped cream’s fat content and condensed milk’s sugar both inhibit crystal formation, so don’t reduce either. Once frozen, always keep tightly covered exposure to freezer air causes ice crystals on the surface. If crystals do form, scrape them off before serving.
Can I use a different pan size?
Yes, but adjust accordingly. An 8×8-inch pan creates thicker layers and fewer servings (9-12 bars). A 9×13-inch pan makes thinner layers perfect for more servings (24-30 bars) but may freeze faster check after 4-5 hours. Loaf pans work beautifully for slicing into neat rectangular portions. Avoid pans smaller than 8×8 inches as layers become too thick and difficult to eat. Always adjust freezing time based on thickness thinner layers set faster.
What if I don’t have vanilla beans?
Simply use 1 tablespoon total vanilla extract (3 teaspoons instead of 2) in the vanilla layer. The flavor will still be excellent, just less visually impressive without those telltale black specks. Vanilla bean paste is an excellent middle-ground substitute use 1 tablespoon paste for similar visual appeal and flavor intensity. Nielsen-Massey and Rodelle make quality vanilla pastes available in most grocery stores.
Can I make this ahead for a party?
This homemade ice cream recipe is ideal for advance preparation! Make it up to 2 weeks ahead and keep frozen until your event. For serving at parties, pre-slice into bars 1-2 hours before guests arrive and return to freezer on a parchment-lined baking sheet. This prevents the scramble of slicing while entertaining. If making the chocolate eclair ice cream cake version, you can even transport it frozen in a cooler with ice packs it stays solid for 2-3 hours.
Why did my layers mix together?
This happens when the first layer isn’t sufficiently frozen before adding the second. The vanilla layer must be firm enough to support the chocolate layer’s weight without sinking or blending. If you can press your finger into the vanilla and it leaves a clear indentation without liquid pooling, it’s not ready freeze longer. Room temperature also matters; if your kitchen is very warm, the vanilla layer’s surface may soften while you prepare the chocolate mixture. Work quickly or return the pan to the freezer between steps.
Can kids help make this recipe?
Absolutely! This is one of the most kid-friendly easy chocolate ice cream recipe options. Children can pulse the food processor (with supervision), press the crust, whisk the condensed milk mixtures, and sprinkle toppings. The folding technique takes practice, so adults should handle whipping cream and final folding to preserve texture. Kids love seeing the distinct layers and choosing where to insert popsicle sticks for their personal eclair ice cream bars.
What’s the best way to insert popsicle sticks?
Insert sticks after the dessert is completely frozen and sliced into bars. Push the stick about halfway through the bar lengthwise, positioning it slightly off-center so it doesn’t hit the bottom crust (which can crack). Alternatively, press sticks into individual bars before the final overnight freeze arrange bars on a parchment-lined baking sheet, insert sticks, then freeze uncovered for 2 hours before transferring to bags. This method creates more stable stick placement.
How do I achieve clean, professional-looking layers?
Level each layer carefully as you add it use an offset spatula or the back of a large spoon to spread from center to edges. The parchment overhang helps create straight sides. For Instagram-worthy cross-sections, freeze completely, then trim ¼ inch from all four sides with a hot knife before slicing into bars. Those trimmed edges can be your “quality control” taste-test pieces! The key is patience rushing the freeze times leads to blurred, melted boundaries between layers.
Can I add mix-ins like chocolate chips or nuts?
Definitely! Fold mix-ins gently into either ice cream layer just before spreading in the pan. Limit mix-ins to ½-¾ cup per layer to avoid overwhelming the base. Mini chocolate chips, chopped nuts, crushed candy bars, or toffee bits all work beautifully. Avoid large chunks that make slicing difficult. For best distribution, sprinkle half the mix-ins over the spread layer, then add the rest and gently swirl with a knife before freezing.
Chocolate Eclair Ice Cream Recipe

If you’ve ever fallen in love with those nostalgic chocolate eclair ice cream bars from the freezer aisle, get ready to recreate that magic at home. This homemade ice cream recipe combines a buttery golden Oreo crust, silky vanilla ice cream, rich chocolate ice cream, and a crunchy cookie topping all without an ice cream maker.
Ingredients
- 24 golden Oreos (cookies and filling)
- 5 tablespoons butter, melted
- 14 ounces sweetened condensed milk
- 2 teaspoons vanilla extract
- 1 vanilla bean, scraped (seeds only)
- ¼ teaspoon sea salt
- 2 cups heavy cream, chilled
- 14 ounces sweetened condensed milk
- ¼ cup dark cocoa powder
- ½ cup fudge brownie mix
- 1 teaspoon vanilla extract
- ¼ teaspoon sea salt
- 2 cups heavy cream, chilled
- 8 golden Oreos
- 8 chocolate creme Oreos
- 1½ tablespoons butter, melted
Instructions
Step 1: Prepare the Pan and Crust
Line your 9×9-inch cake pan with parchment paper, allowing 2-3 inches of overhang on opposite sides this becomes your handle for easy removal later. Add 24 golden Oreos to your food processor and pulse 8-10 times until you achieve fine, even crumbs with no large chunks remaining.
Step 2: Create the Crust Base
Transfer the Oreo crumbs to a bowl and pour in 5 tablespoons melted butter. Stir thoroughly with a fork until every crumb is coated and the mixture looks like wet sand. Dump into your prepared pan and press firmly with the bottom of a measuring cup or your hands, creating an even, compact layer that reaches all corners. Freeze for 15 minutes while you prepare the vanilla layer.
Step 3: Make the Vanilla Ice Cream Base
In a medium bowl, whisk together 14 ounces sweetened condensed milk, 2 teaspoons vanilla extract, the seeds from 1 vanilla bean (run your knife along the split pod and scrape), and ¼ teaspoon sea salt until completely smooth. Set aside.
Step 4: Whip and Fold the Vanilla Layer
In a separate chilled bowl, whip 2 cups cold heavy cream with your hand mixer on medium-high speed for 3-4 minutes until stiff peaks form (the cream should hold its shape when you lift the beaters). Scoop about ½ cup whipped cream into the condensed milk mixture and fold gently to lighten it. Then pour this lightened mixture back into the bowl with remaining whipped cream and fold carefully with a rubber spatula using broad strokes until just combined don’t overmix or you’ll deflate the airiness.
Step 5: Layer and Freeze Vanilla
Pour the vanilla ice cream mixture over your chilled crust and spread evenly with an offset spatula or the back of a spoon. Return to the freezer for 2 hours until firm enough to support the chocolate layer without mixing.
Step 6: Prepare the Chocolate Ice Cream Base
In a clean medium bowl, whisk together 14 ounces sweetened condensed milk, ¼ cup dark cocoa powder, ½ cup fudge brownie mix, 1 teaspoon vanilla extract, and ¼ teaspoon sea salt. Whisk vigorously for 1-2 minutes until the cocoa powder is fully dissolved and no lumps remain the mixture should be glossy and smooth.
Step 7: Whip and Fold the Chocolate Layer
Using a clean bowl, whip another 2 cups chilled heavy cream to stiff peaks (3-4 minutes). Fold about ½ cup whipped cream into the chocolate base to lighten, then fold the chocolate mixture back into the remaining whipped cream using the same gentle folding technique.
Step 8: Add Chocolate Layer
Carefully spread the chocolate ice cream mixture over the set vanilla layer, smoothing to the edges. Return to freezer for 30 minutes just enough to partially set the surface so the cookie crumbles won’t sink.
Step 9: Create Cookie Crumble Topping
Pulse 8 golden Oreos and 8 chocolate creme Oreos in your food processor until you have coarse crumbles (pulse 4-5 times you want texture, not powder). Mix with 1½ tablespoons melted butter until the crumbles are loosely coated but still crumbly.
Step 10: Top and Final Freeze
Sprinkle the cookie crumbles evenly over the semi-frozen chocolate layer, pressing very gently if needed. Cover the pan with plastic wrap or foil and freeze overnight, or at minimum 6-8 hours, until completely solid.
Step 11: Slice and Serve
When ready to serve, lift the frozen dessert from the pan using the parchment overhang. Place on a cutting board and let sit at room temperature for 3-5 minutes to make slicing easier. Use a sharp knife dipped in hot water (wipe between cuts) to slice into 16 bars or your desired portions. For authentic eclair ice cream bars, insert popsicle sticks into individual pieces before the final freeze or immediately after cutting.
Notes
Store your chocolate eclair ice cream cake tightly wrapped in plastic wrap or in an airtight container for up to 2 weeks in the freezer. Individual bars can be wrapped separately in parchment and stored in freezer bags for grab-and-go convenience. No reheating needed simply let sit at room temperature for 3-5 minutes before serving for easier slicing and optimal creamy texture.
Nutrition Information:
Yield:
8Serving Size:
1Amount Per Serving: Calories: 150
This chocolate eclair ice cream recipe proves that bakery-quality frozen desserts are absolutely achievable in your home kitchen no special equipment required. Whether you slice it into elegant chocolate eclair ice cream cake portions for celebrations or create individual eclair ice cream bars for everyday treats, you’re delivering those nostalgic flavors with homemade freshness and quality ingredients.
The combination of buttery cookie crust, dreamy vanilla and chocolate layers, and that signature cookie crumble topping creates an irresistible frozen dessert that disappears fast. Make a double batch you’ll be glad you did!
If you enjoyed this recipe, be sure to save it and share it with friends. Don’t forget to follow us on Pinterest and YouTube for more cozy and comfort recipes.