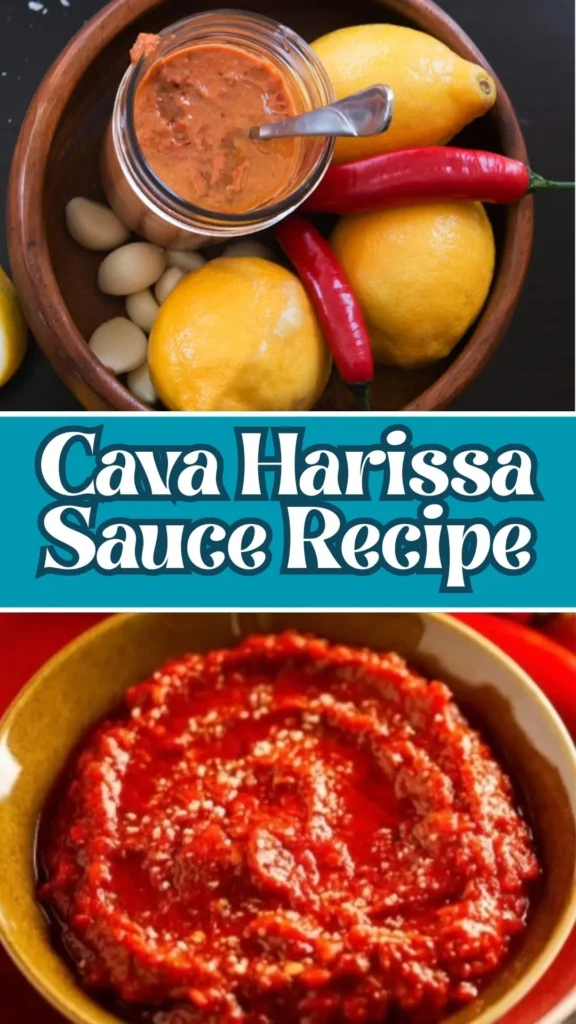
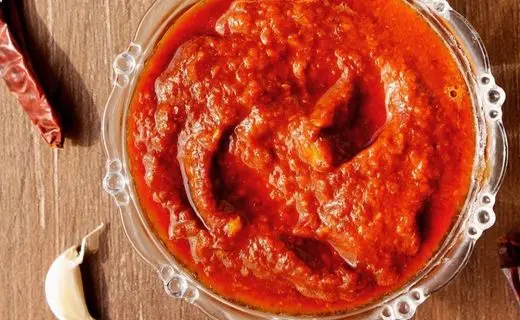
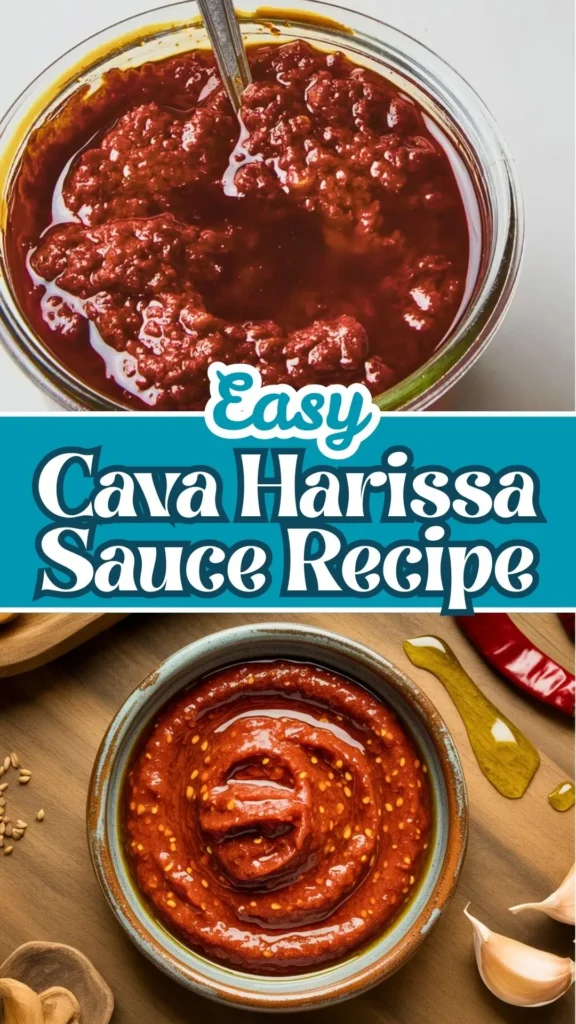
Curiosity around Cava harissa sauce recipe usually starts with its bold flavor and unforgettable heat.
This copycat Cava harissa sauce recipe recreates that signature blend of smoky chilies, earthy spices, and bright citrus notes that define an authentic harissa sauce experience. Crafted from dried chilies, roasted red peppers, and fragrant aromatics, this spicy harissa sauce instantly elevates grain bowls, sandwiches, and marinades with Mediterranean-inspired flair.
Mastering how to make harissa sauce from scratch means enjoying fresh, vibrant flavor anytime, all while keeping a jar of homemade harissa sauce at home ready to transform everyday meals into something extraordinary.
What Does Cava Harissa Sauce Taste Like?
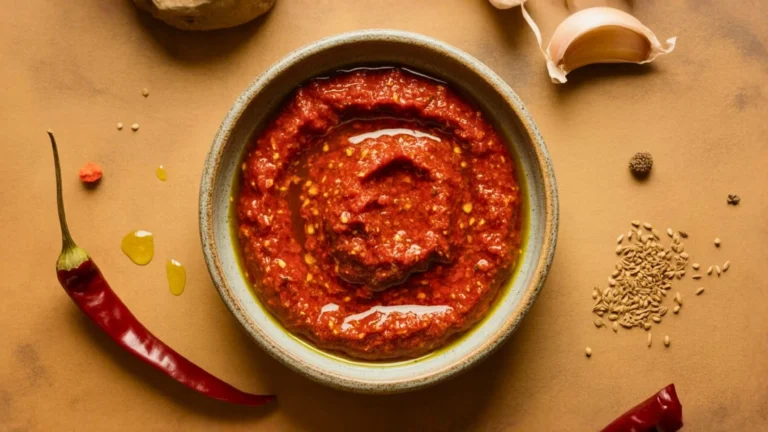
Cava’s harissa sauce delivers a complex flavor profile that’s both bold and balanced.
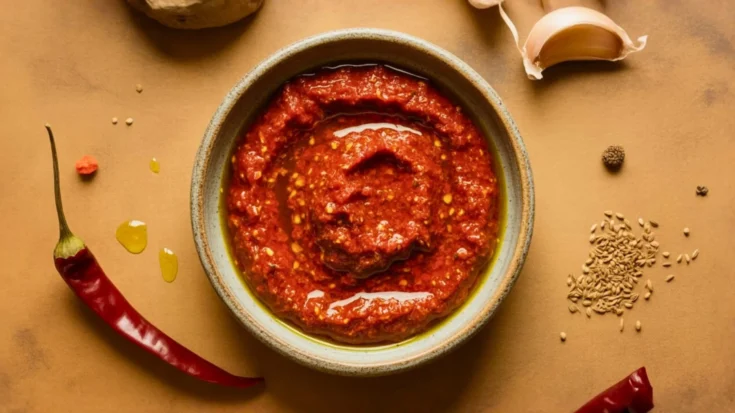
The taste begins with an earthy, smoky depth from toasted dried chilies guajillo and ancho peppers provide a rich, slightly sweet foundation, while arbol chilies add a sharp, lingering heat. Cumin and coriander bring warm, aromatic notes that complement the roasted red bell pepper’s natural sweetness. Fresh lemon juice cuts through the richness with bright acidity, while garlic adds a savory punch.
The result is a thick, velvety sauce with moderate to high heat that builds gradually, finishing with a tangy, umami-rich aftertaste that makes every bite memorable.
Cava Harissa Sauce Recipe Ingredients You’ll Need
For the Harissa Paste Base:
- 6-8 dried guajillo chilies
- 4-5 dried ancho chilies
- 2 dried arbol chilies (whole with seeds)
- 1 red bell pepper (for roasting)
- 4 cloves garlic (smashed)
- 1½ teaspoons ground cumin
- 1½ teaspoons ground coriander
- 2 tablespoons tomato paste
- Juice of ½ to 1 lemon (fresh)
- 1 teaspoon kosher salt (plus more to taste)
- ½ teaspoon freshly ground black pepper
- ½ cup regular olive oil
Kitchen Utensils and Equipment
- Medium pot for boiling water
- Dry skillet or frying pan
- Food processor or high-powered blender
- Tongs
- Sharp knife and cutting board
- Small bowl for spices
- Airtight glass jar or container for storage
- Measuring spoons and cups
Preparation and Cooking Time
Prep Time: 20 minutes
Cook Time: 25 minutes
Resting Time: 2-4 hours (or overnight)
Total Time: 45 minutes (plus resting)
Yield: Approximately 1½ cups
Servings: 12-16 servings (2 tablespoons each)
Cava Harissa Sauce Recipe Instructions
Step 1: Prepare the Dried Chilies
Remove the stems from all guajillo, ancho, and arbol chilies. Carefully break them open lengthwise. For the guajillo and ancho chilies, remove and discard the seeds and veins. Keep the 2 arbol chilies intact with their seeds this is where the heat comes from.
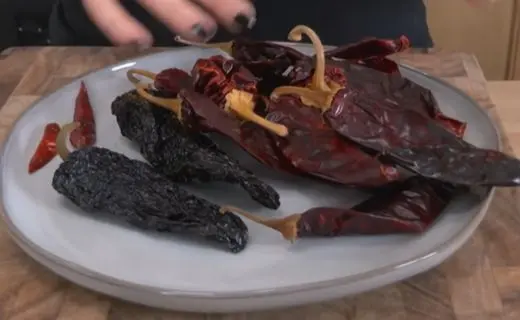
Rinse all cleaned chilies thoroughly under cool running water to remove any dust or debris.
Step 2: Rehydrate the Chilies
Bring a medium pot of water to a rolling boil. Add all the cleaned chilies to the boiling water, then immediately turn off the heat. Let the chilies soak undisturbed for 15-20 minutes until they become soft and pliable.
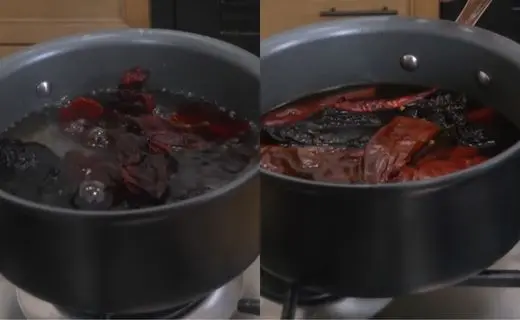
They should feel tender when pressed. Drain the chilies in a colander and use tongs to gently squeeze out excess water. Set aside.
Step 3: Toast the Spices
Heat a dry skillet over medium heat. Add the ground cumin and ground coriander to the pan. Toast the spices for 1-2 minutes, stirring constantly with a wooden spoon, until they become highly fragrant and slightly darker in color.
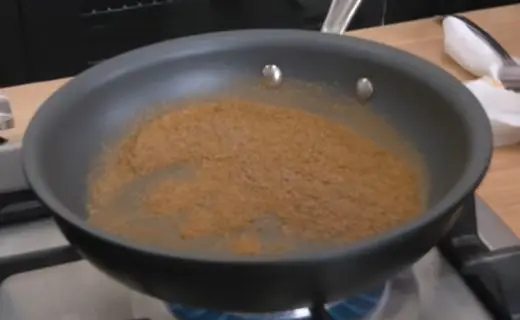
Be careful not to burn them as this creates bitterness. Remove from heat immediately and transfer to a small bowl.
Step 4: Roast the Red Bell Pepper
Roast your red bell pepper using your preferred method: hold it over an open gas flame with tongs, turning until completely charred on all sides, or place it directly under a broiler, rotating every few minutes. Alternatively, roast at 450°F for 20-25 minutes.
Once the skin is blackened and blistered, place the pepper in a covered bowl for 10 minutes to steam. Peel away the charred skin, remove the stem and seeds, and set the roasted flesh aside.
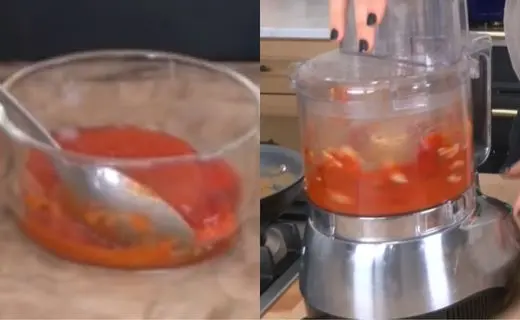
Step 5: Begin Blending
In your food processor, combine the peeled roasted bell pepper, 2 tablespoons of tomato paste, and 4 smashed garlic cloves. Pulse 5-6 times until the ingredients begin to break down and combine into a chunky mixture.
Step 6: Add Main Ingredients
Add the drained rehydrated chilies, toasted cumin and coriander, juice of half a lemon, 1 teaspoon of kosher salt, and ½ teaspoon of freshly ground black pepper to the food processor. Secure the lid tightly.
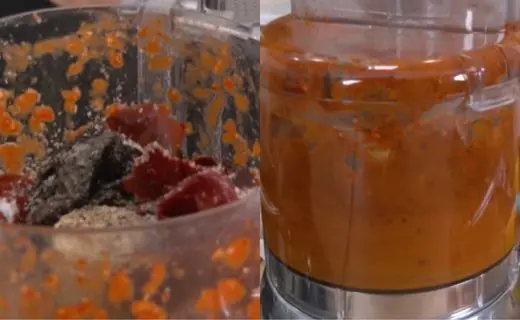
Step 7: Emulsify with Olive Oil
Turn the food processor on and begin blending. With the motor running, slowly drizzle in the ½ cup of regular olive oil through the feed tube in a steady stream. This gradual addition helps create a smooth, emulsified sauce. Blend for 2-3 minutes until the harissa paste reaches a thick, velvety consistency.
Step 8: Adjust Seasoning and Rest
Stop the processor and taste your harissa sauce carefully (it’s spicy!). Add more lemon juice for brightness, additional salt for depth, or more olive oil if you prefer a thinner consistency. Blend again briefly to incorporate.
Transfer the harissa to an airtight glass jar or container, cover, and refrigerate for at least 2-4 hours, or preferably overnight. This resting period allows all the flavors to meld together and develop greater complexity.
Creative Customization and Pairing Ideas for Serving
1. Mediterranean Grain Bowl Enhancement
Transform your homemade harissa sauce into a signature grain bowl component just like Cava does. Drizzle it over a base of warm basmati rice, quinoa, or couscous topped with roasted vegetables, chickpeas, cucumber-tomato salad, hummus, and feta cheese. The spicy harissa sauce ties all the elements together with its bold, smoky heat while complementing the fresh vegetables and creamy components perfectly.
2. Harissa-Spiced Protein Marinade
Use your harissa paste as a powerful marinade for chicken thighs, lamb chops, salmon fillets, or firm tofu. Mix 3 tablespoons of harissa with 2 tablespoons of olive oil and 1 tablespoon of honey for a balanced marinade. Let proteins marinate for 2-4 hours before grilling, roasting, or pan-searing. The dried chilies’ complex flavors penetrate the meat while the acid from the lemon juice tenderizes it beautifully.
3. Elevated Sandwich and Wrap Spread
Replace standard mayo or mustard with a thin layer of harissa sauce on sandwiches, wraps, or pitas. It pairs exceptionally well with grilled chicken, roasted turkey, falafel, or grilled vegetables. For a milder version suitable for those sensitive to heat, mix equal parts harissa with Greek yogurt or labneh to create a creamy, tangy spread with manageable spiciness.
4. Harissa-Infused Soups and Stews
Stir 2-3 tablespoons of this harissa recipe into tomato-based soups, lentil stews, or Moroccan tagines during the last 10 minutes of cooking. The sauce adds incredible depth and a warming heat that develops beautifully when simmered. It’s particularly delicious in chickpea stews, carrot-ginger soup, or roasted red pepper bisque, creating layers of flavor that taste like they’ve been developing for hours.
5. Roasted Vegetable Game-Changer
Toss raw vegetables like cauliflower, carrots, Brussels sprouts, or sweet potatoes with 2 tablespoons of harissa sauce and 1 tablespoon of olive oil before roasting at 425°F. The high heat caramelizes the vegetables while the harissa paste creates a flavorful, slightly charred crust. This technique works brilliantly with root vegetables and brassicas, turning simple sides into show-stopping dishes.
6. Harissa Pasta and Grain Dishes
Stir harissa sauce into warm pasta with olive oil, garlic, and fresh herbs for a North African-inspired pasta dish. It also works wonderfully mixed into cooked farro, orzo, or pearl couscous along with roasted vegetables, fresh herbs, and crumbled cheese. The emulsified olive oil in the harissa helps it coat grains evenly, distributing flavor throughout every bite.
7. Bold Harissa Pairings
Serve Cava Harissa Sauce Recipe with cava chicken recipe for smoky heat, or pair it beside Gus’s Fried Chicken Recipe to add bold spice, tangy contrast, and crave-worthy flavor depth.
8. Dipping Sauce and Appetizer Companion
Serve your homemade harissa as a bold dipping sauce alongside warm pita bread, crispy falafel, grilled halloumi cheese, or roasted vegetable crudités. For an elegant appetizer, swirl harissa sauce into a plate of creamy hummus, creating an attractive spiral pattern. You can also mix it with extra olive oil for a spicy bread-dipping oil that rivals any restaurant offering.
Expert Tips for Perfect Harissa Sauce
1. Choose Quality Dried Chilies
The foundation of authentic harissa sauce starts with selecting pliable, aromatic dried chilies. Look for guajillo and ancho peppers that feel slightly flexible rather than brittle and dusty. Fresh dried chilies (ideally purchased within the past 6 months) have deeper color and more concentrated flavor. Avoid chilies with visible mold spots or those that crumble when touched. Mexican grocery stores typically offer the best selection and prices for these essential ingredients.
2. Control the Heat Level Precisely
The arbol chilies with their seeds intact provide most of the intense heat in this spicy harissa sauce. If you’re sensitive to spice, start with just one arbol chili instead of two, or remove the seeds entirely for a milder version. Conversely, if you want restaurant-level heat, add 3-4 arbol chilies or include a teaspoon of red pepper flakes. Remember that harissa’s heat intensifies during the resting period, so always taste and adjust before the final refrigeration.
3. Don’t Skip Toasting the Spices
Toasting ground cumin and coriander is non-negotiable for developing the deep, complex flavor profile that defines what harissa tastes like. This crucial 1-2 minute step awakens the essential oils in the spices, transforming them from flat and dusty to aromatic and nuanced. Watch them carefully and remove from heat the moment you smell their fragrance burnt spices will ruin your entire batch with bitterness.
4. Properly Roast and Char the Bell Pepper
A well-roasted red bell pepper contributes essential sweetness and smokiness to balance the heat from the chilies. Whether using an open flame, broiler, or oven, ensure the pepper’s skin is thoroughly blackened and blistered on all sides. The charred exterior adds a subtle smokiness that mimics traditional harissa made over wood fires. Steam the pepper for 10 minutes after roasting this makes the skin peel away effortlessly while keeping the flesh intact.
5. Achieve the Right Consistency
The ideal harissa paste should be thick enough to cling to a spoon but smooth enough to drizzle. If your harissa recipe turns out too thick, blend in additional olive oil one tablespoon at a time until you reach the desired consistency. If it’s too thin, add an extra tablespoon of tomato paste or a few more rehydrated chili pieces and blend again. The sauce will thicken slightly after refrigeration, so aim for a consistency that’s just slightly thinner than you ultimately want.
6. Allow Adequate Resting Time
Patience pays off when making harissa sauce from scratch. The overnight rest in the refrigerator isn’t optional it’s when the magic happens. During this time, the sharp raw garlic mellows, the citrus brightens the overall flavor, the spices bloom fully, and all the components marry into a cohesive, complex sauce. Fresh harissa tastes good, but rested harissa tastes incredible. If you’re in a rush, give it at least 2-3 hours minimum.
7. Store and Preserve Properly
Transfer your copycat Cava harissa sauce to a clean glass jar and create a protective layer by pouring a thin film of olive oil (about 2 tablespoons) on top before sealing. This oil barrier prevents oxidation and extends shelf life significantly. Stored this way in the refrigerator, harissa keeps for 2-3 weeks. For longer storage, freeze harissa in ice cube trays, then transfer the frozen cubes to a freezer bag where they’ll keep for up to 3 months perfect for adding instant flavor to future meals.
Storage and Reheating Guidance
Store your harissa sauce in an airtight glass container in the refrigerator for up to 3 weeks. Top with a thin layer of olive oil to preserve freshness and prevent oxidation. No reheating necessary serve at room temperature for best flavor.
Common Questions and FAQs About Harissa Sauce
Here, we’ve got you covered with some common questions about the Cava Harissa Sauce Recipe that people often ask.
What is harissa?
Harissa is a North African chili paste originating from Tunisia, made from a blend of dried red chilies, olive oil, garlic, and aromatic spices like cumin and coriander. It’s a staple condiment throughout the Maghreb region and has gained popularity worldwide as a versatile flavor enhancer.
What is harissa at Cava?
At Cava, harissa is their signature hot sauce a smoky, moderately spicy condiment featured prominently in their Mediterranean grain bowls and menu items. Their version balances heat with sweetness and is slightly thicker than traditional North African harissa, making it perfect for drizzling and dipping.
What’s the difference between harissa paste and harissa sauce?
Harissa paste is thicker and more concentrated, similar to tomato paste consistency, while harissa sauce is thinned with additional olive oil or liquid to make it pourable and easier to drizzle. This recipe creates a sauce-like consistency that closely mimics Cava’s version.
Is harissa sauce very spicy?
The heat level varies based on the chilies used and their proportions. This recipe creates a medium-hot sauce noticeably spicy but not overwhelming. The arbol chilies provide the primary heat, so you can adjust spiciness by modifying the quantity or removing their seeds for a milder version.
Can I make harissa sauce less spicy?
Absolutely! Reduce or eliminate the arbol chilies, remove all seeds from the other peppers, or add extra roasted red bell pepper and tomato paste to dilute the heat. You can also mix the finished harissa with Greek yogurt or sour cream to create a cooling, milder version.
What can I substitute for dried guajillo chilies?
If you can’t find guajillo chilies, substitute with dried New Mexico chilies, dried California chilies, or additional ancho chilies. Each provides a similar mild heat with slightly different flavor notes New Mexico chilies are earthier, while California chilies are sweeter.
Can I use fresh chilies instead of dried?
Fresh chilies create a different flavor profile less smoky and concentrated. If using fresh red chilies like Fresno or red jalapeños, you’ll need about 8-10 peppers to match the intensity of dried chilies. The traditional method using dried chilies produces more authentic, complex flavor.
Do I need to toast whole spices, or can I use pre-ground?
Pre-ground spices work perfectly fine and save time, which is what this recipe uses. However, if you have whole cumin and coriander seeds, toasting and grinding them yourself produces even more aromatic, fresh-tasting harissa with enhanced depth.
How do I roast a bell pepper without a gas stove?
Use your oven’s broiler by placing the pepper on the top rack, rotating every 5 minutes until blackened, or roast at 450°F for 25-30 minutes. You can also use a grill or even hold the pepper with tongs over an electric burner. Any method that chars the skin works beautifully.
Why does my harissa taste bitter?
Bitterness usually comes from burnt spices or chilies. Make sure to toast spices only until fragrant (1-2 minutes maximum) and avoid over-processing, which can create heat and bitterness. Also ensure your dried chilies aren’t old or moldy, as stale chilies develop bitter flavors.
Can I make harissa without a food processor?
Yes! You can use a high-powered blender (like a Vitamix), an immersion blender in a deep container, or traditionally pound ingredients in a large mortar and pestle. A blender may require slightly more liquid to get the blades moving, so have extra olive oil ready.
How do I use harissa sauce in everyday cooking?
Mix it into mayonnaise for spicy aioli, stir into scrambled eggs, blend with butter for compound butter, add to salad dressings, use as a pizza sauce base, mix into ground meat for burgers, or simply spread on toast with avocado. The possibilities are endless!
Is harissa sauce the same as sriracha or hot sauce?
No harissa has a more complex, earthy flavor profile with warm spices, while sriracha is vinegar-forward and sweeter. Harissa is thicker, richer, and contains no vinegar, making it fundamentally different from American-style hot sauces in both taste and texture.
Can I freeze harissa sauce?
Yes! Harissa freezes exceptionally well. Pour it into ice cube trays for convenient single-serving portions, freeze until solid, then transfer cubes to a freezer bag. Frozen harissa keeps for 3-4 months and can be added directly to hot dishes or thawed overnight in the refrigerator.
Why is olive oil important in harissa?
Olive oil serves multiple purposes: it helps emulsify the ingredients into a smooth sauce, carries the fat-soluble flavors from the spices and chilies, adds richness and body, and acts as a preservative by creating a protective barrier that extends shelf life when stored properly.
What does “regular olive oil” mean in this recipe?
Regular olive oil (also called pure or light olive oil) has a neutral flavor and higher smoke point compared to extra virgin olive oil. Using regular olive oil prevents the harissa from tasting too grassy or bitter, allowing the chilies and spices to be the stars.
How long does homemade harissa last?
Properly stored in the refrigerator with a layer of olive oil on top, homemade harissa stays fresh for 2-3 weeks. Always use clean utensils when scooping it out to prevent contamination. For longer storage, freeze in portions for up to 3-4 months.
Can I adjust the lemon juice amount?
Definitely! Start with half a lemon’s juice and taste before adding more. The acidity balances the rich, oily chilies and helps preserve the sauce. Some prefer a tangier harissa with a full lemon’s worth of juice, while others like it more subtle with less citrus presence.
Is harissa gluten-free and vegan?
Yes! This harissa recipe is naturally gluten-free, vegan, dairy-free, and plant-based. It contains only vegetables, chilies, spices, and oil no animal products or gluten-containing ingredients. It’s suitable for most dietary restrictions including paleo and Whole30 diets.
Why do I need to remove chili seeds?
Chili seeds and the white ribs contain most of the capsaicin (heat compound) but little flavor. Removing them from guajillo and ancho chilies allows their complex, fruity flavors to shine through while keeping the arbol chilies’ seeds intact for controlled, intentional heat in the final sauce.
Cava Harissa Sauce Recipe
Curiosity around Cava harissa sauce usually starts with its bold flavor and unforgettable heat. This copycat Cava harissa sauce recipe recreates that signature blend of smoky chilies, earthy spices, and bright citrus notes that define an authentic harissa sauce experience.
Ingredients
- 6-8 dried guajillo chilies
- 4-5 dried ancho chilies
- 2 dried arbol chilies (whole with seeds)
- 1 red bell pepper (for roasting)
- 4 cloves garlic (smashed)
- 1½ teaspoons ground cumin
- 1½ teaspoons ground coriander
- 2 tablespoons tomato paste
- Juice of ½ to 1 lemon (fresh)
- 1 teaspoon kosher salt (plus more to taste)
- ½ teaspoon freshly ground black pepper
- ½ cup regular olive oil
Instructions
Step 1: Prepare the Dried Chilies
Remove the stems from all guajillo, ancho, and arbol chilies. Carefully break them open lengthwise. For the guajillo and ancho chilies, remove and discard the seeds and veins. Keep the 2 arbol chilies intact with their seeds this is where the heat comes from. Rinse all cleaned chilies thoroughly under cool running water to remove any dust or debris.
Step 2: Rehydrate the Chilies
Bring a medium pot of water to a rolling boil. Add all the cleaned chilies to the boiling water, then immediately turn off the heat. Let the chilies soak undisturbed for 15-20 minutes until they become soft and pliable. They should feel tender when pressed. Drain the chilies in a colander and use tongs to gently squeeze out excess water. Set aside.
Step 3: Toast the Spices
Heat a dry skillet over medium heat. Add the ground cumin and ground coriander to the pan. Toast the spices for 1-2 minutes, stirring constantly with a wooden spoon, until they become highly fragrant and slightly darker in color. Be careful not to burn them as this creates bitterness. Remove from heat immediately and transfer to a small bowl.
Step 4: Roast the Red Bell Pepper
Roast your red bell pepper using your preferred method: hold it over an open gas flame with tongs, turning until completely charred on all sides, or place it directly under a broiler, rotating every few minutes. Alternatively, roast at 450°F for 20-25 minutes. Once the skin is blackened and blistered, place the pepper in a covered bowl for 10 minutes to steam. Peel away the charred skin, remove the stem and seeds, and set the roasted flesh aside.
Step 5: Begin Blending
In your food processor, combine the peeled roasted bell pepper, 2 tablespoons of tomato paste, and 4 smashed garlic cloves. Pulse 5-6 times until the ingredients begin to break down and combine into a chunky mixture.
Step 6: Add Main Ingredients
Add the drained rehydrated chilies, toasted cumin and coriander, juice of half a lemon, 1 teaspoon of kosher salt, and ½ teaspoon of freshly ground black pepper to the food processor. Secure the lid tightly.
Step 7: Emulsify with Olive Oil
Turn the food processor on and begin blending. With the motor running, slowly drizzle in the ½ cup of regular olive oil through the feed tube in a steady stream. This gradual addition helps create a smooth, emulsified sauce. Blend for 2-3 minutes until the harissa paste reaches a thick, velvety consistency.
Step 8: Adjust Seasoning and Rest
Stop the processor and taste your harissa sauce carefully (it’s spicy!). Add more lemon juice for brightness, additional salt for depth, or more olive oil if you prefer a thinner consistency. Blend again briefly to incorporate. Transfer the harissa to an airtight glass jar or container, cover, and refrigerate for at least 2-4 hours, or preferably overnight. This resting period allows all the flavors to meld together and develop greater complexity.
Notes
Store your harissa sauce in an airtight glass container in the refrigerator for up to 3 weeks. Top with a thin layer of olive oil to preserve freshness and prevent oxidation. No reheating necessary serve at room temperature for best flavor.
Nutrition Information:
Yield:
6Serving Size:
1Amount Per Serving: Calories: 70
Now that you know how to make harissa sauce from scratch, you have the power to bring Cava’s bold, smoky flavors into your home kitchen anytime. This copycat Cava harissa sauce recipe delivers restaurant-quality results with simple ingredients and straightforward techniques.
The beauty of homemade harissa paste lies in its versatility it transforms everything from breakfast eggs to dinner proteins with just a spoonful. Give this spicy harissa sauce a try, adjust it to your heat preference, and discover why harissa has become a beloved staple in kitchens worldwide.
If you enjoyed this recipe, be sure to save it and share it with friends. Don’t forget to follow us on Pinterest and YouTube for more cozy and comfort recipes.