There’s something magical about the marriage of rich espresso and creamy cheesecake-it’s sophisticated yet comforting, indulgent yet surprisingly easy to make, much like the nostalgic sweetness of a penn station cookie paired with the crunchy delight of maple nut goodies, creating a dessert experience that feels both classic and irresistible.
This copycat espresso coffee cheesecake recipe brings together the buttery crunch of Biscoff cookies, the bold intensity of coffee, and the cloud-like texture of whipped cream cheese. No oven required, no water bath stress, just pure no-bake coffee cheesecake bliss that sets beautifully in your fridge.
Whether you’re a coffee lover craving your next dessert fix or hosting friends who appreciate cafe-style elegance, this espresso cheesecake delivers that perfect balance of bitter and sweet in every silky bite.
What Does It Taste Like?
Imagine the first sip of a perfectly pulled espresso shot transformed into a velvety dessert. This coffee cheesecake greets you with the warm, caramelized notes from the Biscoff cookie crust-think speculoos spice meets buttery crunch.

The filling itself is where the magic happens: bold coffee flavor bloomed to perfection, wrapped in tangy cream cheese that’s been whipped to airy lightness. It’s not overly sweet; instead, it mimics that sophisticated café mocha experience.
The whipped cream folding technique creates an almost mousse-like texture that melts on your tongue, while the cocoa powder dusting adds a subtle chocolate whisper. Each forkful feels like dessert and your favorite coffee order combined into one indulgent, grown-up treat.
Espresso Coffee Cheesecake Ingredients You’ll Need
For the Biscoff Crust:
- 200g (about 7 oz) Biscoff cookies, finely crushed
- 80g (about 6 tablespoons) unsalted butter, melted
- Pinch of salt (optional, to balance sweetness)
And for the Coffee Cheesecake Filling:
- 2 tablespoons instant coffee (or instant espresso powder for stronger flavor)
- 3 tablespoons warm water (for blooming the coffee)
- 500g (about 17.6 oz) cream cheese, softened to room temperature
- 100g (about ½ cup) granulated sugar (or powdered sugar for smoother texture)
- 1 teaspoon vanilla extract
- 300ml (about 1¼ cups) heavy whipping cream, whipped to soft peaks
Topping:
- Extra whipped cream (for decorating)
- Cocoa powder (unsweetened, for dusting)
- Optional: chocolate shavings, espresso beans, or Biscoff cookie crumbles
Kitchen Utensils You’ll Need
- 8-inch or 9-inch springform pan (or any pan with removable bottom)
- Food processor or rolling pin with zip-lock bag (for crushing cookies)
- Mixing bowls (at least 2 medium-large bowls)
- Electric hand mixer or stand mixer
- Rubber spatula
- Measuring cups and spoons
- Small bowl (for blooming coffee)
- Offset spatula or butter knife (for smoothing)
- Fine-mesh sieve or small sifter (for cocoa powder)
- Plastic wrap or parchment paper
- Refrigerator space
Preparation and Cooking Time
- Prep Time: 20 minutes
- Chilling Time: 4-6 hours (or overnight for best results)
- Total Time: 4 hours 20 minutes (minimum)
- Servings: 8-10 slices
- Difficulty Level: Easy (beginner-friendly, no-bake)
Step-by-Step Espresso Coffee Cheesecake Recipe Instructions
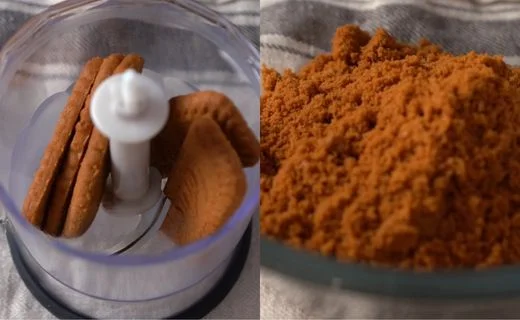
Step 1: Prepare Your Biscoff Cookie Crust
Crush the Biscoff cookies into fine crumbs using a food processor or place them in a sealed plastic bag and crush with a rolling pin until you achieve a sandy texture. Transfer the cookie crumbs to a bowl, pour in the melted butter, and mix thoroughly until the mixture resembles wet sand and holds together when pressed.
Press this mixture firmly and evenly into the bottom of your springform pan, using the bottom of a glass or measuring cup to compact it. Place the crust in the refrigerator to set while you prepare the filling.
Step 2: Bloom the Instant Coffee
In a small bowl, combine the instant coffee granules with warm water. Stir until completely dissolved-this “blooming” process intensifies the coffee flavor and ensures no grainy texture in your final cheesecake.

Set aside to cool to room temperature (you don’t want hot coffee melting your cream cheese).
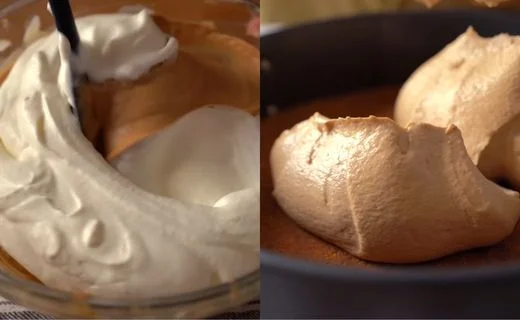
Step 3: Whip the Cream Cheese to Perfection
This is crucial: place your softened cream cheese in a large mixing bowl and beat it with an electric mixer on medium-high speed for 3-4 minutes.
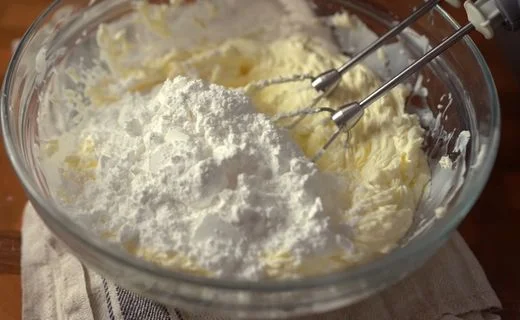
Don’t just stir-actually whip air into it until it becomes noticeably lighter, fluffier, and completely smooth with no lumps. Add the sugar and vanilla extract, then continue beating for another 2 minutes until silky and pale.
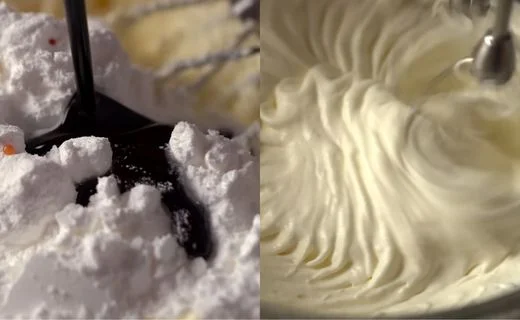
Step 4: Incorporate the Coffee
Pour the cooled, bloomed coffee into the whipped cream cheese mixture. Beat on medium speed until the coffee is fully incorporated and the mixture is uniformly tan-colored with no streaks.
Scrape down the sides of the bowl to ensure everything is combined. Taste and adjust coffee strength if desired (add more bloomed coffee for bolder flavor).
Step 5: Fold in the Whipped Cream
In a separate bowl, whip your heavy cream to soft peaks-it should hold its shape but still have a slight droop when you lift the beaters.
Take about one-third of the whipped cream and gently fold it into the coffee cream cheese mixture using a rubber spatula, making sweeping motions from the bottom up.
This lightens the mixture. Then fold in the remaining whipped cream in two additions, being careful not to deflate the airiness. The filling should be light, mousse-like, and billowy.
Step 6: Assemble and Smooth
Remove your chilled crust from the refrigerator. Pour the coffee cheesecake filling over the Biscoff base, using your spatula to spread it evenly to the edges.
Gently tap the pan on the counter 2-3 times to release any air bubbles. Use an offset spatula to create a perfectly smooth top surface.
Step 7: Chill Until Set
Cover the cheesecake loosely with plastic wrap (make sure it doesn’t touch the surface) or parchment paper. Refrigerate for at least 4-6 hours, though overnight is ideal for the firmest, most sliceable texture. The cheesecake needs this time for the cream cheese to firm up and flavors to meld.
Step 8: Release, Decorate, and Serve
When ready to serve, run a thin knife or offset spatula around the inside edge of the springform pan to loosen the cheesecake from the sides. Carefully release and remove the springform ring. Pipe or dollop fresh whipped cream on top in decorative swirls.
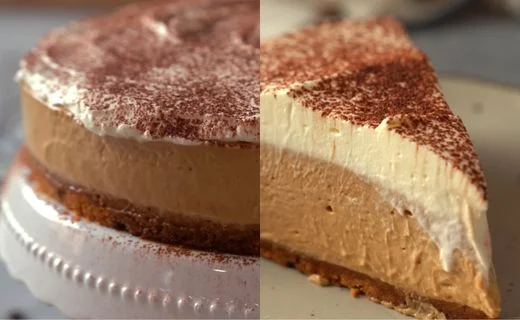
Place cocoa powder in a fine-mesh sieve and gently tap it over the cheesecake for an elegant dusting. Slice with a sharp knife (wiped clean between cuts) and serve immediately.
Customization and Pairing Ideas to Elevate Your Espresso Cheesecake
1. Transform It into Chocolate Espresso Cheesecake
Add 100g of melted and cooled dark chocolate to your cream cheese mixture along with the bloomed coffee. This creates a chocolate espresso cheesecake that’s richer and more decadent. You can also mix cocoa powder (2-3 tablespoons) directly into the filling for a lighter chocolate flavor. Top with chocolate ganache instead of whipped cream for an ultra-indulgent finish.
2. Cookie Crust Variations
While Biscoff cookies provide that signature caramelized flavor, you can swap them for Oreo cookies (cream removed) for a chocolate espresso cheesecake base, graham crackers for classic sweetness, or even gingersnaps for a spicy kick. Chocolate wafer cookies create a darker, more sophisticated foundation that coffee lovers adore.
3. Liqueur-Infused Adult Version
Add 2-3 tablespoons of Kahlúa, Baileys Irish Cream, or Frangelico to your coffee cheesecake filling for a boozy twist perfect for dinner parties. The alcohol not only adds complex flavor but also helps achieve an even creamier texture. Replace some of the warm water used for blooming coffee with your chosen liqueur.
4. Layered Presentation
Create individual servings in clear glasses or jars by layering crumbled Biscoff crust, coffee cheesecake filling, and whipped cream repeatedly. This not only looks stunning but also makes portion control easier and eliminates the need for slicing. Top each glass with a whole Biscoff cookie standing upright.
5. Pairing Suggestions for Serving
Serve your espresso cheesecake alongside a shot of actual espresso or a cappuccino for the ultimate coffee experience. It pairs beautifully with fresh berries (raspberries cut the richness perfectly), salted caramel sauce drizzled over each slice, or a scoop of vanilla bean ice cream. For brunch gatherings, serve smaller slices with mimosas or Irish coffee.
6. Mocha Version with Coffee Syrup
Drizzle homemade or store-bought coffee syrup over each slice before serving, or create a mocha version by mixing chocolate syrup into the coffee before blooming it. You can also create a marbled effect by swirling melted chocolate through the filling before chilling.
7. Seasonal and Festive Adaptations
During holidays, add a pinch of cinnamon or pumpkin spice to the filling for warmth. In summer, lighten it up by increasing the whipped cream ratio slightly and serving with iced coffee granita on the side. For special occasions, garnish with gold leaf, chocolate-covered espresso beans, ortempered chocolate decorations for an Instagram-worthy presentation.
Expert Tips for the Perfect No-Bake Coffee Cheesecake
1. Room Temperature Cream Cheese is Non-Negotiable
Cold cream cheese will not whip properly and will result in a lumpy filling no matter how long you mix. Take your cream cheese out of the refrigerator at least 1-2 hours before starting. If you forgot, cut it into cubes and microwave in 10-second bursts, but be careful not to melt it. Properly softened cream cheese should indent easily when pressed but still hold its shape.
2. Don’t Skip the Whipping Step
The secret to that cafe-style silky texture is genuinely whipping air into the cream cheese, not just mixing it. Beat it for a full 3-4 minutes until the color lightens and the texture becomes noticeably fluffier. This creates the mousse-like consistency that makes this no bake coffee cheesecake recipe so special. Under-beaten cream cheese results in a dense, heavy filling.
3. Bloom Your Coffee Properly
Instant coffee or espresso powder should always be dissolved in warm (not hot) water before adding to the filling. This “blooming” process fully activates the coffee flavor and prevents any gritty texture. Use a 1:1.5 ratio of coffee to water, and let it cool completely before adding to cream cheese. For extra-bold coffee flavor, use espresso powder instead of regular instant coffee.
4. Soft Peaks, Not Stiff Peaks
When whipping your cream, stop at soft peaks-where the cream holds its shape but the peaks gently fold over when you lift the beaters. Over-whipped cream (stiff peaks) will make folding difficult and can cause the filling to separate or become grainy. Under-whipped cream won’t provide enough structure. The sweet spot is creamy, billowy, and just stable.
5. Fold, Don’t Stir
The folding technique is what keeps your coffee cheesecake recipe light and airy rather than dense. Use a rubber spatula and make sweeping motions from the bottom of the bowl up and over, rotating the bowl as you go. Work gently and stop as soon as no white streaks remain. Over-mixing deflates all those precious air bubbles you worked hard to create.
6. Chill Time is Flavor Time
While 4 hours is the minimum for the cheesecake to set properly, overnight chilling (8-12 hours) is ideal. This extended time allows the coffee flavor to fully develop and permeate the cream cheese, the Biscoff crust to soften slightly for easier cutting, and the texture to become perfectly firm yet creamy. Patience truly pays off with no-bake cheesecakes.
7. The Clean Slice Trick
For picture-perfect slices, use a long, sharp knife dipped in hot water and wiped completely dry between each cut. The heat helps the knife glide through the cream cheese without dragging or creating messy edges. Alternatively, unflavored dental floss works brilliantly-hold it taut and press straight down through the cheesecake, then pull out from the side.
Storage and Reheating Guidance
Store your espresso coffee cheesecake covered in the refrigerator for up to 5 days-the flavors actually deepen beautifully over time. For longer storage, freeze individual slices wrapped tightly in plastic wrap and aluminum foil for up to 2 months; thaw overnight in the refrigerator before serving. No reheating needed for this chilled dessert.
Common Queries and FAQs
Your guide to frequently asked Espresso Coffee Cheesecake Recipe questions and answers
Can I make this coffee cheesecake without a springform pan?
Absolutely! You can use a regular pie dish, square baking pan, or even make individual portions in cups or jars. If using a pan without a removable bottom, line it with parchment paper with overhang on the sides to lift the cheesecake out easily. Individual servings in small glasses or ramekins are particularly impressive and eliminate the need for clean slicing.
My cheesecake filling is too runny. What went wrong?
The most common culprit is under-whipped cream cheese or over-whipped cream that’s lost its structure. Make sure your cream cheese is beaten until genuinely fluffy (3-4 minutes), and your whipped cream is at soft peaks, not liquid or grainy. Also ensure you didn’t add hot coffee to the mixture, which can cause separation. If your filling seems too loose, add an extra tablespoon of instant coffee (bloomed) or fold in more freshly whipped cream.
Can I use regular coffee instead of instant coffee?
While instant coffee or espresso powder is preferred because it dissolves completely without adding excess liquid, you can use very strong brewed espresso that’s been reduced by half on the stovetop and cooled completely. Use about 3-4 tablespoons of this concentrated coffee. Avoid using regular-strength brewed coffee as it will make your filling too liquidy and the flavor won’t be intense enough.
How do I know when my no-bake cheesecake is fully set?
The cheesecake should feel firm to gentle touch in the center and not jiggle like liquid when you tap the pan. It should hold its shape when you run a knife around the edge. If it still seems too soft after 6 hours, give it more time-no-bake cheesecakes can take 8-12 hours to fully firm up depending on your refrigerator temperature and the humidity in your filling.
Can I make this cheesecake dairy-free or vegan?
Yes, with substitutions! Use dairy-free cream cheese (like cashew-based or coconut cream cheese), coconut cream whipped to soft peaks instead of dairy whipping cream, and dairy-free butter for the crust. The texture will be slightly different but still delicious. Make sure your Biscoff cookies are vegan-friendly (most are, but check labels). The coffee flavor actually helps mask any coconut taste if using coconut products.
Why does my Biscoff crust fall apart when slicing?
You likely didn’t use enough butter to bind the cookie crumbs, or didn’t press the mixture firmly enough into the pan. The ratio should be about 3 parts cookie crumbs to 1 part melted butter. Press very firmly with the bottom of a glass, especially around the edges. Chilling the crust before adding the filling helps it set, and letting the finished cheesecake sit at room temperature for 10 minutes before slicing makes cutting easier.
Can I add chocolate to make it a chocolate espresso cheesecake?
Definitely! Melt 100-150g of good quality dark chocolate, let it cool to room temperature (still liquid but not hot), and mix it into your whipped cream cheese along with the bloomed coffee. For a lighter chocolate flavor, add 3-4 tablespoons of unsweetened cocoa powder. You can also create a marbled effect by swirling melted chocolate through the filling just before chilling.
How far in advance can I make this cheesecake?
This copycat espresso coffee cheesecake recipe is perfect for make-ahead entertaining! You can prepare it up to 2 days in advance-just wait to add the whipped cream topping and cocoa powder dusting until a few hours before serving to keep them fresh. The flavors actually improve overnight as the coffee permeates the filling and the crust softens slightly.
My cheesecake has cracks on top. Did I do something wrong?
Good news: with a no bake coffee cheesecake, cracks are extremely rare since there’s no oven temperature change causing them. If you do notice any imperfections, it’s likely from overmixing after adding the whipped cream (which creates air pockets) or from the pan being jostled before it’s fully set. The beauty of this recipe is that you’ll cover the top with whipped cream and cocoa powder anyway, so any minor surface issues disappear completely!
What’s the difference between instant coffee and instant espresso powder?
Instant espresso powder is more concentrated and has a deeper, slightly darker roasted flavor than regular instant coffee. For this recipe, either works beautifully, but espresso powder will give you a more authentic café-style intensity. If using regular instant coffee, you might want to increase the amount by half a tablespoon for bolder flavor. Both dissolve completely, which is why they’re preferred over brewed coffee.
Can I halve this recipe for a smaller cheesecake?
Yes! Use a 6-inch springform pan and halve all ingredients. The chilling time remains the same (4-6 hours minimum). Conversely, you can double the recipe for a crowd using a 10-inch pan or making two 8-inch cheesecakes. The beauty of this no bake coffee cheesecake recipe is its scalability.
Why is my whipped cream deflating or weeping?
This happens when cream is over-whipped (becomes grainy and separates) or when sugar is added too early. For best results, whip cold heavy cream (straight from the fridge) with cold beaters until soft peaks form, adding sugar only near the end. If making whipped cream for topping in advance, stabilize it with a tablespoon of powdered sugar or cream cheese to prevent deflation.
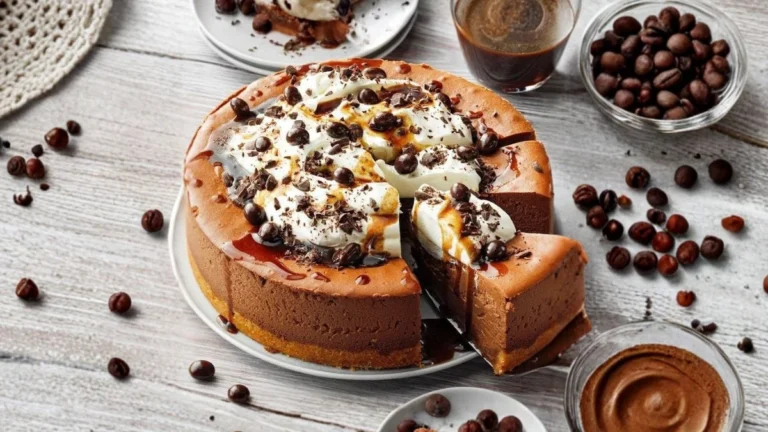
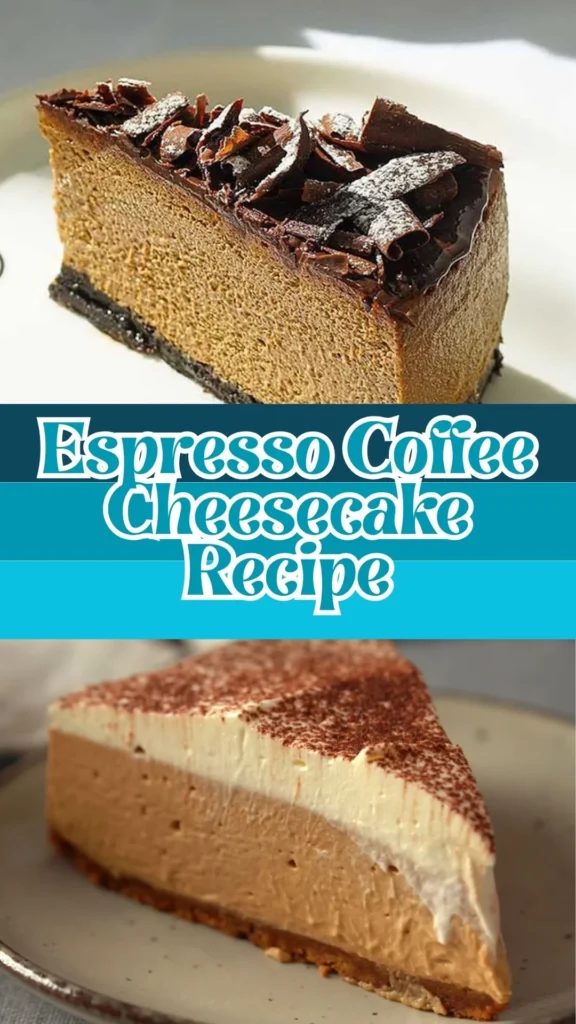
Espresso Coffee Cheesecake Recipe

There’s something magical about the marriage of rich espresso and creamy cheesecake-it’s sophisticated yet comforting, indulgent yet surprisingly easy to make. This copycat espresso coffee cheesecake recipe brings together the buttery crunch of Biscoff cookies, the bold intensity of coffee, and the cloud-like texture of whipped cream cheese. No oven required, no water bath stress, just pure no-bake coffee cheesecake bliss that sets beautifully in your fridge.
Ingredients
- 200g (about 7 oz) Biscoff cookies, finely crushed
- 80g (about 6 tablespoons) unsalted butter, melted
- Pinch of salt
- 2 tablespoons instant coffee
- 3 tablespoons warm water500g (about 17.6 oz) cream cheese, softened to room temperature
- 100g (about ½ cup) granulated sugar
- 1 teaspoon vanilla extract
- 300ml (about 1¼ cups) heavy whipping cream, whipped to soft peaks
- Extra whipped cream
- Cocoa powder
- Optional: chocolate shavings, espresso beans, or Biscoff cookie crumbles
Instructions
Step 1: Prepare Your Biscoff Cookie Crust
Crush the Biscoff cookies into fine crumbs using a food processor or place them in a sealed plastic bag and crush with a rolling pin until you achieve a sandy texture. Transfer the cookie crumbs to a bowl, pour in the melted butter, and mix thoroughly until the mixture resembles wet sand and holds together when pressed. Press this mixture firmly and evenly into the bottom of your springform pan, using the bottom of a glass or measuring cup to compact it. Place the crust in the refrigerator to set while you prepare the filling.
Step 2: Bloom the Instant Coffee
In a small bowl, combine the instant coffee granules with warm water. Stir until completely dissolved-this “blooming” process intensifies the coffee flavor and ensures no grainy texture in your final cheesecake. Set aside to cool to room temperature (you don’t want hot coffee melting your cream cheese).
Step 3: Whip the Cream Cheese to Perfection
This is crucial: place your softened cream cheese in a large mixing bowl and beat it with an electric mixer on medium-high speed for 3-4 minutes. Don’t just stir-actually whip air into it until it becomes noticeably lighter, fluffier, and completely smooth with no lumps. Add the sugar and vanilla extract, then continue beating for another 2 minutes until silky and pale.
Step 4: Incorporate the Coffee
Pour the cooled, bloomed coffee into the whipped cream cheese mixture. Beat on medium speed until the coffee is fully incorporated and the mixture is uniformly tan-colored with no streaks. Scrape down the sides of the bowl to ensure everything is combined. Taste and adjust coffee strength if desired (add more bloomed coffee for bolder flavor).
Step 5: Fold in the Whipped Cream
In a separate bowl, whip your heavy cream to soft peaks-it should hold its shape but still have a slight droop when you lift the beaters. Take about one-third of the whipped cream and gently fold it into the coffee cream cheese mixture using a rubber spatula, making sweeping motions from the bottom up. This lightens the mixture. Then fold in the remaining whipped cream in two additions, being careful not to deflate the airiness. The filling should be light, mousse-like, and billowy.
Step 6: Assemble and Smooth
Remove your chilled crust from the refrigerator. Pour the coffee cheesecake filling over the Biscoff base, using your spatula to spread it evenly to the edges. Gently tap the pan on the counter 2-3 times to release any air bubbles. Use an offset spatula to create a perfectly smooth top surface.
Step 7: Chill Until Set
Cover the cheesecake loosely with plastic wrap (make sure it doesn’t touch the surface) or parchment paper. Refrigerate for at least 4-6 hours, though overnight is ideal for the firmest, most sliceable texture. The cheesecake needs this time for the cream cheese to firm up and flavors to meld.
Step 8: Release, Decorate, and Serve
When ready to serve, run a thin knife or offset spatula around the inside edge of the springform pan to loosen the cheesecake from the sides. Carefully release and remove the springform ring. Pipe or dollop fresh whipped cream on top in decorative swirls. Place cocoa powder in a fine-mesh sieve and gently tap it over the cheesecake for an elegant dusting. Slice with a sharp knife (wiped clean between cuts) and serve immediately.
Notes
Store your espresso coffee cheesecake covered in the refrigerator for up to 5 days-the flavors actually deepen beautifully over time. For longer storage, freeze individual slices wrapped tightly in plastic wrap and aluminum foil for up to 2 months; thaw overnight in the refrigerator before serving. No reheating needed for this chilled dessert.
Nutrition Information:
Yield:
10Serving Size:
1Amount Per Serving: Calories: 160
There’s nothing quite like slicing into a perfectly set espresso coffee cheesecake that you’ve made with your own hands-no oven required, no stress involved, just pure creamy satisfaction. The beauty of this no bake coffee cheesecake recipe lies in its simplicity and the impressive results that look and taste like they came from an upscale café.
Whether you’re serving it at a dinner party or treating yourself to a mid-week pick-me-up, each velvety bite delivers that irresistible coffee-and-cream combination that dessert dreams are made of.
If you enjoyed this recipe, be sure to save it and share it with friends. Don’t forget to follow us on Pinterest and YouTube for more cozy and comfort recipes.